DIY Baby Food: Healthy and Cost-Effective
.jpg)
DIY baby food, or homemade baby food, offers numerous benefits for both the health of your baby and your budget. By preparing baby food at home, you have control over the ingredients and can ensure that your little one receives the best nutrition possible. making baby food yourself is a cost-effective solution compared to store-bought options.
When it comes to making DIY baby food, there are essential tools and equipment that you’ll need. This includes a blender or food processor to puree the ingredients, a steamer or pot with a steaming basket for cooking, and ice cube trays or baby food storage containers for portioning and storing the food.
The process of making DIY baby food involves a few simple steps. First, you’ll need to choose fresh and organic ingredients. Then, wash and prepare the ingredients accordingly. Next, cook or steam the ingredients until they are soft and easily mashable. After that, use a blender or food processor to blend or puree the ingredients into a smooth consistency. Finally, portion and store the baby food in ice cube trays or baby food storage containers for easy access and convenience.
To get you started, there are popular DIY baby food recipes that you can try, such as avocado and banana puree, sweet potato and carrot mash, and apple and spinach puree. These recipes provide a variety of flavors and nutrients for your baby to enjoy.
When making DIY baby food, it’s important to keep a few tips in mind. First, introduce one ingredient at a time to detect any possible allergies or sensitivities. Second, use proper storage techniques to maintain freshness and prevent spoilage. Lastly, don’t be afraid to experiment with flavor combinations to expose your baby to a variety of tastes and textures.
By choosing DIY baby food, you can provide your baby with nutritious meals while being mindful of your budget. With the right tools, simple steps, and delicious recipes, you can embark on a healthy and cost-effective journey of feeding your little one.
Key takeaways:
- Homemade baby food promotes better health: Making your own baby food ensures that it is free from preservatives, additives, and excess salt or sugar, providing your baby with fresh and nutritious options.
- DIY baby food saves money: Pre-packaged baby food can be costly, while homemade baby food allows you to save money by using affordable, seasonal ingredients and buying in bulk.
- Investing in essential tools makes DIY baby food easier: Having a blender or food processor, a steamer or pot with a steaming basket, and ice cube trays or baby food storage containers can simplify the process of making homemade baby food and ensure convenient storage.
Why Choose DIY Baby Food?
Why opt for DIY baby food? Discover the reasons behind this popular choice. From the health advantages of homemade baby food to its cost-effective nature, we’ll explore the benefits that make more and more parents embrace this culinary adventure for their little ones. So, why settle for store-bought when you can provide your baby with nourishing, budget-friendly, and homemade meals? Let’s delve into the world of DIY baby food and unlock its endless possibilities.
1. Health Benefits of Homemade Baby Food
Making homemade baby food offers numerous health benefits for infants, ensuring they receive the nutrients they need for optimal growth and development. Here are some key benefits of homemade baby food:
- Freshness and Quality: By making baby food at home, you have control over the ingredients, which ensures they are fresh, organic, and free from additives or preservatives. This freshness and quality contribute to the health benefits of homemade baby food.
- Nutritional Value: Homemade baby food retains more nutrients compared to processed varieties, as it is not subjected to prolonged heating or excessive processing. This higher nutritional value is an important aspect of the health benefits of homemade baby food.
- Customization: One of the significant health benefits of homemade baby food is the ability to tailor the flavors and textures to suit your baby’s preferences. This customization allows you to gradually introduce them to different tastes and textures, promoting their overall development and future eating habits.
- Cost-Effectiveness: Aside from the health benefits, preparing homemade baby food can also be cost-effective. It can save you money in the long run compared to buying commercially-produced baby food. This cost-effectiveness is an added advantage of making homemade baby food.
Fact: According to research, infants who consume homemade baby food are more likely to develop healthier eating habits and preferences later in life. The health benefits of homemade baby food extend beyond infancy and contribute to long-term positive dietary choices.
2. Cost-Effective Solution
Choosing to make DIY baby food can be a cost-effective solution for parents. Here are some reasons why:
- Savings: Making your own baby food can save you money compared to buying pre-packaged options.
- Control: You have full control over the quality and ingredients used in your baby’s meals.
- Waste Reduction: By making homemade baby food, you can reduce the amount of packaging waste generated.
- Flexibility: You can tailor the recipes to suit your baby’s taste preferences and nutritional needs.
- Batch Cooking: Preparing larger batches of baby food can save time and ensure you always have meals ready.
Making DIY baby food can provide a cost-effective solution to provide healthy and nutritious meals for your little one.
Essential Tools and Equipment for Making DIY Baby Food
Looking to whip up some nutritious and budget-friendly DIY baby food? Well, you’re in the right place! In this section, we’ll dive into the must-have tools and equipment that will make your homemade baby food journey a breeze. From powerful blenders to steamers and storage containers, we’ve got you covered. So, let’s roll up our sleeves and discover the essential tools that will help you create wholesome meals for your little one.
1. Blender or Food Processor
A blender or food processor is an indispensable tool for creating homemade baby food. Here is a compilation of reasons why it holds utmost importance:
- Efficiency: Using a blender or food processor allows for quick and efficient pureeing of fruits, vegetables, and other ingredients, resulting in a smooth consistency that is easy for infants to consume.
- Versatility: With a blender or food processor, you have the flexibility to create various textures and consistencies, ranging from silky purees to slightly chunkier mashes, catering to your baby’s evolving needs as they grow.
- Control over ingredients: Opting to make your own baby food gives you the freedom to select fresh and organic ingredients that you trust, ensuring that your baby receives optimal nutrition without any additives or preservatives.
- Cost-effectiveness: Investing in a blender or food processor for DIY baby food can save you money in the long run compared to purchasing pre-packaged baby food.
- Convenience: By having a blender or food processor at home, you can prepare baby food in larger quantities and store it for later use, streamlining mealtime preparation.
The inception of the blender can be traced back to the 1920s when Stephen Poplawski designed the first electric blender specifically for soda fountain drinks. Over time, blenders gained popularity for household use, including the preparation of baby food. Nowadays, blenders and food processors have become indispensable tools in numerous kitchens, especially for parents who prefer making their own baby food.
2. Steamer or Pot with Steaming Basket
A steamer or pot with a steaming basket is an essential tool for making DIY baby food. Steaming is a gentle cooking method that helps to retain the nutrients in the ingredients while making them soft and easy to blend. Here are a few reasons why a steamer or pot with a steaming basket is beneficial for making homemade baby food:
One mom shared how using a steamer or pot with a steaming basket for making homemade baby food transformed her baby’s eating habits. Steaming helped preserve the vibrant colors and natural flavors of the ingredients, making mealtime enjoyable for her little one. With the ease and convenience of a steamer or pot with a steaming basket, she was able to provide her baby with nutritious and delicious meals every day.
3. Ice Cube Trays or Baby Food Storage Containers
Using ice cube trays or baby food storage containers is essential when making DIY baby food. These tools allow you to portion and store the food conveniently. Ice cube trays are great for freezing small portions of pureed food, while baby food storage containers are perfect for storing larger quantities. Look for trays or containers that are BPA-free and safe for freezing. Some popular options include silicone ice cube trays with lids or stackable baby food storage containers with measurement markings. Proper storage techniques help maintain freshness and prevent food waste. With these ice cube trays or baby food storage containers, you can easily prepare and store homemade baby food for your little one’s nourishment and convenience.
Steps to Make DIY Baby Food
Looking to make your own baby food? Look no further! In this section, we’ll dive into the step-by-step process for creating homemade baby food that is healthy and cost-effective. From selecting the freshest organic ingredients to blending and storing, we’ve got you covered. Get ready to embark on a culinary journey that will ensure your little one gets the nutrition they need, all while saving you some hard-earned cash. Let’s roll up our sleeves and get cooking!
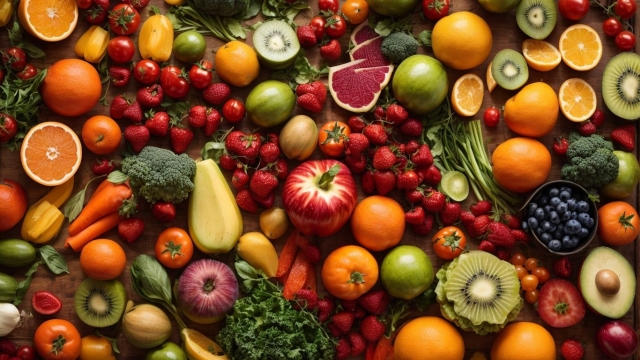
1. Choose Fresh and Organic Ingredients
Choosing fresh and organic ingredients is crucial when making DIY baby food for your little one’s health and well-being.
| Benefits | Fresh Ingredients | Organic Ingredients |
| 1. Nutrient Content | Opt for fresh ingredients as they retain a higher nutrient content compared to processed ones. | Go for organic ingredients that are free from harmful pesticides and chemicals. |
| 2. Flavor and Taste | Incorporate fresh ingredients to offer vibrant flavors and tastes that babies will love. | Include organic ingredients to enhance the natural flavors without any artificial additives. |
| 3. Safety | By using fresh ingredients, you minimize the risk of contamination or spoilage. | Opt for organic ingredients that are grown without genetically modified organisms. |
For optimal health benefits, always choose fresh and organic ingredients in your homemade baby food recipes and prioritize your baby’s well-being.
2. Wash and Prepare the Ingredients
Washing and preparing the ingredients is a crucial step in making DIY baby food to ensure its safety and nutritional value.
- Choose fresh and organic ingredients to minimize exposure to pesticides and additives.
- Wash and prepare fruits and vegetables under running water to remove dirt, bacteria, and pesticide residue.
- Peel and remove seeds or pits from fruits to avoid choking hazards.
- Trim off tough or inedible parts of vegetables.
- Cut ingredients into small, manageable pieces for easier cooking and blending.
By taking these steps, you can ensure that your homemade baby food is clean, safe, and nutritious for your little one.
In the 1800s, cleanliness in food preparation was recognized as essential for preventing foodborne illnesses. Pioneers like Florence Nightingale advocated for proper hygiene practices, such as washing and preparing ingredients, to improve public health.
3. Cook or Steam the Ingredients
When making DIY baby food, cooking or steaming the ingredients is a crucial step for ensuring their safety and digestibility. Here is a step-by-step guide on how to cook or steam the ingredients:
- Choose fresh and organic ingredients, such as vegetables or fruits.
- Wash and prepare the ingredients by removing any dirt, stems, or peels.
- Cook or steam the ingredients by boiling them in water or steaming them until they are soft and tender.
- Alternatively, use a steamer or pot with a steaming basket to preserve the nutrients in the ingredients.
- Once the ingredients are cooked or steamed, allow them to cool before proceeding to the next step of blending or pureeing.
4. Blend or Puree the Ingredients
Blending or pureeing the ingredients is a crucial step in making DIY baby food. Here are the steps to follow:
- Place the cooked or steamed ingredients into a blender or food processor and blend or puree until smooth and creamy, adding water or breast milk if necessary to achieve the desired consistency.
- Continue blending or pureeing until all lumps and chunks are gone.
- Test the texture by running a small amount of the puree between your fingers to ensure it is smooth enough for your baby to swallow.
- Transfer the puree into portion-sized containers or ice cube trays for easy storage and future use.
Suggestions:
- Experiment with different ingredient combinations to introduce new flavors to your baby.
- Freeze the puree in small portions for convenience and to minimize waste.
- Label and date the containers or trays for easy organization.
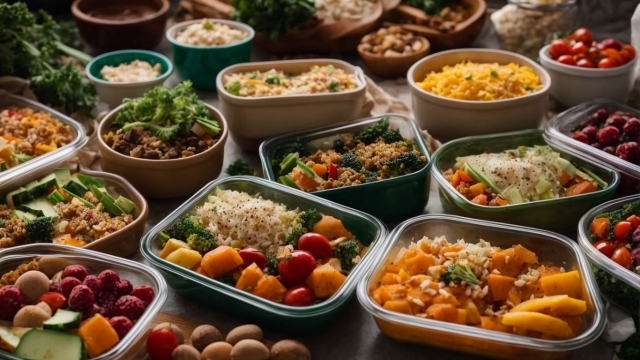
5. Portion and Store the Baby Food
- Follow these steps to properly portion and store homemade baby food:
- Allow the prepared food to cool completely before portioning.
- Choose appropriate storage containers, such as ice cube trays or baby food storage containers.
- For ice cube trays, fill each compartment with the baby food and cover with a lid or plastic wrap.
- If using baby food storage containers, spoon the desired amount of food into each container and seal with airtight lids.
- Label each container with the type of food and the date it was made.
- Place the filled containers in the freezer for long-term storage.
- When you’re ready to use the baby food, remove a portion from the freezer and allow it to thaw in the refrigerator overnight.
- Avoid refreezing thawed baby food and discard any leftovers that have been sitting at room temperature for more than two hours.
By properly portioning and storing homemade baby food, you can ensure that your baby has fresh and nutritious meals ready to go.
Popular DIY Baby Food Recipes
When it comes to DIY baby food, one thing is for sure – there’s an array of popular recipes that parents swear by. In this section, we’ll delve into some mouthwatering creations that your little one will love. From the creamy goodness of avocado and banana puree to the comforting blend of sweet potato and carrot mash, and the nutritious punch of apple and spinach puree, get ready to whip up some healthy and cost-effective delights for your baby’s taste buds to savor. Let’s dive into these delectable recipes!
1. Avocado and Banana Puree
To prepare a nutritious avocado and banana puree for your baby, follow these easy instructions:
- First, select a ripe avocado and a ripe banana.
- Next, peel the avocado and remove the pit.
- Then, peel the banana and cut it into small pieces.
- After that, place the avocado and banana pieces into a blender or food processor.
- Blend the ingredients until the mixture becomes smooth and creamy. If necessary, add a little water or breast milk to achieve the desired consistency.
- Transfer the puree into ice cube trays or baby food storage containers.
- For future use, freeze the puree. Alternatively, refrigerate it if you plan to serve it immediately.
Avocado and banana puree is an excellent choice for introducing solid foods to your little one. It provides healthy fats, fiber, essential vitamins, and minerals. Furthermore, it is easily digestible, making it suitable for your baby’s delicate stomach.
2. Sweet Potato and Carrot Mash
This delicious and nutritious baby food recipe combines the goodness of sweet potatoes and carrots. Here’s a simple table outlining the ingredients and steps to make this Sweet Potato and Carrot Mash:
| Ingredients | Steps |
|---|---|
| Sweet potatoes | 1. Peel and dice the sweet potatoes. |
| Carrots | 2. Peel and chop the carrots. |
| Water | 3. Boil water in a pot or steamer. |
| 4. Add the sweet potatoes and carrots to the pot or steamer. Cook until tender. | |
| 5. Drain the water and let the vegetables cool slightly. | |
| 6. Transfer the vegetables to a blender or food processor. Blend until smooth. | |
| 7. Add water if needed to achieve the desired consistency. | |
| 8. Spoon the mash into ice cube trays or baby food storage containers. | |
| 9. Store in the refrigerator or freezer. |
This Sweet Potato and Carrot Mash is packed with vitamins and fiber, making it a nutritious choice for your little one. Serve it warm or cold, and watch your baby enjoy this tasty homemade treat.
3. Apple and Spinach Puree
|
To create a nutritious and delicious Apple and Spinach Puree for your little one, follow these simple steps:
|
Tips for Making DIY Baby Food
When it comes to making DIY baby food, you want to ensure it’s not only healthy but also cost-effective. So, here are some valuable tips that will guide you in creating nutritious meals for your little one. We’ll cover the importance of introducing one ingredient at a time, the proper storage techniques to preserve freshness, and even delve into the exciting world of flavor combinations. Get ready to embark on a culinary journey that will nourish your baby’s taste buds and promote their healthy growth!
1. Introduce One Ingredient at a Time
Introducing one ingredient at a time is crucial when making DIY baby food. By introducing one ingredient at a time, you can easily identify any potential allergens or digestive issues that your baby may have. It also helps your baby develop a taste for individual flavors, ensuring they are able to appreciate the natural taste of each ingredient. Introducing one ingredient at a time allows you to monitor your baby’s reactions and identify any adverse effects before introducing new ingredients. This method of gradual introduction promotes healthy eating habits and helps your baby adapt to a variety of flavors and textures. Remember, always consult with your pediatrician before introducing new foods to your baby.
2. Use Proper Storage Techniques
To ensure the safety and freshness of DIY baby food, it’s important to use proper storage techniques like using ice cube trays or baby food storage containers to portion and store the baby food. Also, don’t forget to label the containers with the date and type of baby food to keep track of freshness. Store the baby food in the refrigerator for up to three days or in the freezer for up to three months. When using the frozen baby food, you can safely thaw it in the refrigerator overnight or use a microwave on a defrost setting. Remember, it’s crucial to avoid refreezing thawed baby food as this helps maintain its quality.
3. Experiment with Flavor Combinations
Experimenting with flavor combinations is a delightful and innovative approach to introducing new tastes to your baby’s palate. It can help nurture their taste buds and broaden their food preferences. Here are some flavor combinations to consider when preparing DIY baby food:
| Ingredients | Flavor Combination |
|---|---|
| Avocado | Avocado and Banana Puree |
| Sweet Potato and Carrot | Sweet Potato and Carrot Mash |
| Apple and Spinach | Apple and Spinach Puree |
Pro-tip: Experiment with flavor combinations by starting with simple ones and gradually incorporating more ingredients as your baby becomes accustomed to different flavors. Enjoy the exploration of diverse flavor profiles and observe your baby’s reactions to discover their preferences.
Facts:
Some Facts About DIY Baby Food: Healthy and Cost-Effective:
- ✅ Making homemade baby food is a cost-effective alternative to store-bought options. (Source: Our Team)
- ✅ Homemade baby food allows you to control the ingredients your baby ingests. (Source: Our Team)
- ✅ Prepared homemade baby food is usually less expensive than buying pre-packaged options. (Source: Our Team)
- ✅ Michigan State University Extension educators recommend making homemade baby food. (Source: Our Team)
- ✅ Making baby food at home is a simple process that can save you money. (Source: Our Team)
Frequently Asked Questions
How do I make homemade baby food?
To make homemade baby food, choose fresh and organic produce, if possible, to reduce pesticide exposure. Remove seeds, skins, and gristle from the ingredients. Boil or steam firm vegetables until tender, and cook meats and fish until well done. Blend the ingredients into a puree, adjusting the consistency with water if needed. Allow the food to cool before serving, especially if it contains boiled vegetables. Leftovers can be refrigerated for up to 48 hours or used within 24 hours if they contain meat, fish, or eggs.
Are store-bought baby foods safe to consume?
A recent report revealed that commercial baby foods are contaminated with toxic heavy metals, such as arsenic, lead, cadmium, and mercury. While the exact impact of these metals on child development is still unknown, there is currently no scientific evidence suggesting that the consumption of these foods negatively impacts health outcomes. However, preparing homemade baby food is recommended to avoid the uncertainties associated with packaged food.
How is homemade baby food beneficial?
Homemade baby food offers several benefits. First, it allows parents to have full control over the ingredients, ensuring nutritional control for their babies. Second, making your own baby food can save you money compared to buying prepared foods. Third, homemade baby food avoids the manufacturing processes that make food shelf-stable, reducing potential contamination risks. Lastly, shopping seasonally and preparing at home provides an opportunity to introduce babies to a variety of foods while cutting down on the grocery budget.
What are the risks associated with packaged baby foods?
Packaged baby foods have been found to potentially contain toxic heavy metals like arsenic, lead, cadmium, and mercury. The impact of these metals on baby’s neurological development and long-term brain function is still unknown. Additionally, the U.S. Food and Drug Administration does not regulate baby food in terms of documenting the levels of these metals. Therefore, there are gaps in knowledge regarding the impact of these metals on human development and health outcomes.
Is there a recommended age to introduce homemade baby food?
Homemade baby food can be introduced when the baby reaches approximately 4 to 6 months of age, depending on their stage of development and readiness. Starting with mashed versions of common fruits and vegetables, such as avocados and bananas, can help babies become accustomed to solid foods. It is recommended to consult with a pediatrician to determine the most appropriate time to introduce specific foods.
How should homemade baby food be stored?
Leftover homemade baby food should be stored in a sealed container and refrigerated for up to 48 hours. However, if the food contains meat, fish, or eggs, it should be used within 24 hours. Alternatively, homemade baby food can be frozen for longer storage. The food can be spooned into ice cube trays or freezer containers and then transferred to freezer bags once frozen. Proper labeling with the date is recommended for easy tracking.

- How to Reduce Food Waste and Save Money - October 28, 2023
- Frugal Snack Ideas for Kids - October 27, 2023
- Top 10 Frugal Meal Ideas for Large Families - October 27, 2023