How to Organize a Clothing Swap with Friends
.jpg)
A clothing swap is a fun and sustainable way to refresh your wardrobe by exchanging clothes with your friends. It involves gathering a group of friends, bringing the clothes they no longer wear, and swapping them with others. Organizing a clothing swap allows you to declutter your closet, find new and unique pieces, and reduce textile waste.
There are several reasons why you should consider organizing a clothing swap. Firstly, it’s an eco-friendly alternative to buying new clothes, promoting the reuse and recycling of clothing items. Secondly, it gives you the opportunity to discover new styles and trends without spending money. Lastly, it promotes a sense of community and shared interests among friends.
To organize a successful clothing swap, there are several steps you can follow. Begin by determining the logistics, such as the number of participants and the types of clothing items to be included. Next, set a date and find a suitable venue to host the event. Once the details are in place, invite your friends and establish guidelines for the swapping process.
Preparing the space is crucial to ensure a smooth and enjoyable experience. Categorize and sort the clothes beforehand to make it easier for participants to find what they need. Create an organized display area where clothes can be easily browsed.
During the clothing swap, focus on creating a fun and social atmosphere. Encourage participants to interact, share fashion tips, and try on different outfits. Establish swapping rules to ensure fairness and avoid any conflicts.
Providing refreshments adds an extra touch of enjoyment to the event. Offer light snacks and beverages to keep everyone energized and engaged.
After the clothing swap, encourage participants to donate any unswapped clothes to local charities or organizations. This helps extend the lifecycle of the clothing items and benefits those in need. Lastly, clean up and organize the space to leave it tidy for the next event.
By following these steps, you can organize a successful clothing swap that promotes sustainability, community, and a renewed sense of style among friends.
Key takeaways:
- Determine the logistics: Before organizing a clothing swap with friends, determine the details such as the location, time, and guidelines. This will help ensure a smooth event.
- Make it fun and social: To make the clothing swap enjoyable, create a lively atmosphere with music, snacks, and games. Encourage conversations and interactions between participants.
- Donate unswapped clothes: After the clothing swap, donate any unswapped clothes to charity. This ensures that the clothes find new homes and reduces waste.
What is a Clothing Swap?
What is a Clothing Swap?
A clothing swap is an event where people exchange clothes they no longer wear or need. It’s a sustainable and budget-friendly way to refresh your wardrobe. Participants bring their gently used clothing items and accessories to the swap. They can then browse through the items that others have brought and choose what they like. Clothing swaps encourage reusing and recycling, and they can be a fun way to socialize with friends while also reducing fashion waste. Fun Fact: Did you know that clothing swaps can help reduce carbon emissions and water consumption associated with textile production?
Why Should You Organize a Clothing Swap?
Why Should You Organize a Clothing Swap? Consider the numerous advantages of hosting a clothing swap with friends. Not only does it foster sustainable fashion, breathing new life into clothing that would otherwise go unused and minimizing textile waste, but it also provides an opportunity for participants to revamp their wardrobe without spending a dime. Rather than purchasing new garments, they can trade items they no longer prefer for fresh styles. Moreover, this collaborative event bolsters social interaction and strengthens friendships, creating an enjoyable environment where individuals can connect over shared fashion interests. In addition, when any remaining clothes are left unswapped, organizing a clothing swap enables you to contribute to meaningful charitable causes by donating them to those who are less fortunate.
Steps to Organize a Clothing Swap
Looking to host a delightful clothing swap with your friends? Look no further! In this section, we’ll break down the essential steps to organize a successful clothing swap. From figuring out the logistics and setting a date and venue, to inviting your friends and establishing guidelines, we’ll cover everything you need to know. And of course, we can’t forget about preparing the space to create the perfect swapping atmosphere. Let’s dive in and get ready to revamp our wardrobes in the most exciting and sustainable way!
Determine the Logistics
- Organize the logistics of your clothing swap to ensure a successful event.
- Determine the purpose and theme of the clothing swap.
- Estimate the number of attendees to gauge the size of the venue.
- Calculate the budget for refreshments, decorations, and any other expenses.
- Select a location with sufficient space to accommodate all participants.
- Set a date and time that is convenient for the majority of your friends, and send out invitations.
- Create a system for participants to RSVP and indicate the items they plan to bring.
- Assign responsibilities, such as organizing racks or arranging fitting rooms.
- Plan for additional activities like a fashion show or a clothing alteration station.
Set a Date and Venue
To successfully organize a clothing swap, the first crucial step is to set a specific date and venue. Here are some simple steps that will help you navigate through the process:
- Begin by checking the availability of your friends and select a date that works for the majority.
- Choose a suitable venue, such as your own home, a community center, or even a local park.
- Take into consideration the number of attendees and ensure that the venue can comfortably accommodate them all.
- Double-check if there are any restrictions or permits necessary for using the chosen venue.
- Make sure to select a date and venue that are convenient for everyone to access.
Once you have successfully set a date and venue, you can proceed with the remaining preparations for your clothing swap.
Fun fact: Clothing swaps not only provide a sustainable method to refresh your wardrobe but also foster community bonding and assist in reducing textile waste.
Invite Your Friends
Inviting your friends is a crucial step in organizing a clothing swap. Here are some valuable tips to consider:
- Create a guest list: Make a list of friends who would be interested in participating and decide how many people you want to invite.
- Send out invitations: Utilize various communication platforms like emails, text messages, or social media to invite your friends. Don’t forget to include the date, time, and location of the event.
- Encourage participation: Emphasize the benefits of a clothing swap, such as saving money and contributing to sustainability, to motivate your friends to join in.
- Specify guidelines: Inform your friends about the suitable clothes for swapping, considering factors like size, condition, and style preferences.
- Provide reminders: Send timely reminders closer to the event date to ensure that your friends remember to bring their clothes.
Establish Guidelines
Establishing guidelines is a crucial step when organizing a clothing swap with friends. It is essential to ensure a smooth and fair swapping process where everyone can discover pieces they adore.
- Size and Style Guidelines: It is important to ask participants to bring clothing items that are in good condition, fit within the event’s size range, and align with the agreed-upon style, such as casual or workwear.
- Swapping Guidelines: To establish fairness, decide on the number of items each person can take home. You have the choice of a one-for-one exchange or implementing a token system where participants earn tokens for each item they bring.
- Fitting Room Rules: If possible, designate an area specifically for trying on clothes and establish rules for the process. This may include setting time limits or regulating the number of items tried at once.
- Etiquette Guidelines: Encourage participants to show respect, consideration, and patience during the swapping process. Remind everyone to handle clothes with care and return items to their designated spots if not chosen.
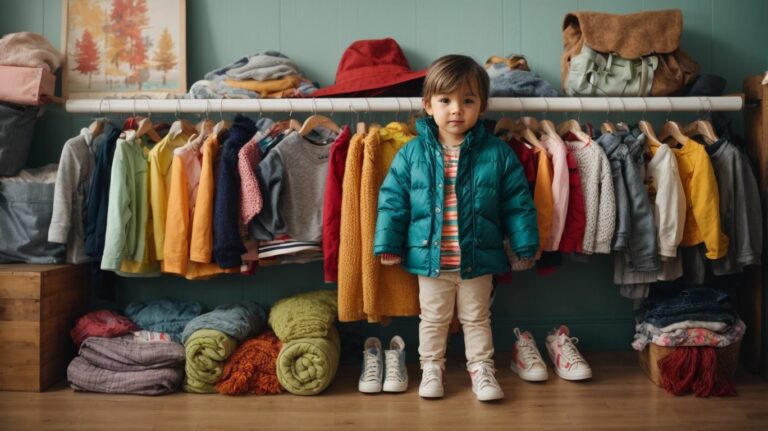
Prepare the Space
When preparing the space for a clothing swap, it is crucial to ensure that the area is clean and decluttered. This involves clearing out any unnecessary items and tidying up the designated space where the clothing swap will take place. Additionally, it is important to arrange racks or tables to display the clothes, allowing enough space for participants to easily browse and try on items. To make the experience more convenient, consider creating fitting areas or providing portable dressing rooms for attendees to try on clothes comfortably. Strategic placement of mirrors will also allow people to see how the clothes look on them. Furthermore, ensuring an ample supply of hangers and garment racks will help to maintain the neatness of the displayed clothes. To complete the organization process, set up a separate area or table for accessories such as shoes, bags, and jewelry. By following these steps, you can create a well-organized and inviting space for your clothing swap. So go ahead, have fun, and enjoy the swapping experience with your friends!
How to Sort and Display Clothes
Sorting and displaying clothes is a crucial step when organizing a clothing swap with friends. In this section, we’ll dive into the art of categorizing and sorting clothes, making the process efficient and enjoyable. We’ll also explore creative ways to display the clothes, ensuring everyone can easily browse and find their perfect pieces. So, get ready to transform your space into a fashion-forward haven for swapping and styling!
Categorize and Sort the Clothes
| Step 1: | Gather all the clothes that participants have brought to the clothing swap. |
| Step 2: | Separate the clothes into categories such as tops, bottoms, dresses, and accessories to categorize and sort the clothes efficiently. |
| Step 3: | Within each category, sort the clothes based on size, color, or style to properly categorize and sort the clothes. |
| Step 4: | Label each category and organize them into different sections for easy browsing to categorize and sort the clothes effectively. |
| Step 5: | Carefully arrange the clothes on racks or tables, making them visually appealing and accessible after categorizing and sorting them. |
One time, during a clothing swap with friends, we categorized and sorted the clothes into unique themes like “Boho Chic” and “Athleisure” to enhance the experience of categorizing and sorting the clothes. It made the swapping experience more exciting and allowed everyone to find their preferred style easily.
Display the Clothes
During a clothing swap, displaying the clothes in an organized and appealing manner is crucial. Here is a table summarizing the steps to display the clothes:
| Steps | Description |
|---|---|
| Display the Clothes | Group clothes by type, such as tops, bottoms, dresses, etc. Then sort them by size or any other relevant criteria. |
| Arrange on Racks or Tables | Use racks or tables to display the clothes neatly. Hang clothes on hangers or fold them neatly on tables. |
| Create Sections | Divide the display area into sections for different types of clothes. Label each section to make it easier for participants. |
| Consider Color Coordination | If possible, arrange clothes by color to make the display visually appealing and help participants find what they’re looking for. |
| Provide Mirrors | Set up mirrors near the display area so participants can try on clothes and see how they look. |
In the true history of clothing swaps, it is believed that the idea originated in the 1990s as a way to promote sustainability and community involvement. The concept quickly gained popularity, leading to the organization of large-scale clothing swap events worldwide. Today, clothing swaps continue to be a fun and eco-friendly way for people to refresh their wardrobes without spending money while also reducing textile waste.
During the Clothing Swap
During the clothing swap, you have the perfect opportunity to make it a fun and social event. Set the tone by establishing swapping rules that ensure fairness and create anticipation among your friends. Don’t forget to provide refreshments to keep everyone energized throughout the swap. Let the laughter and excitement fill the room as you exchange stylish garments and create lasting memories together.
Make It Fun and Social
To ensure that your clothing swap is enjoyable and fosters a social atmosphere, there are several steps you can take:
- Create a vibrant and lively ambiance by encouraging your friends to bring a plus one. This will not only expand the guest list, but also contribute to the social atmosphere.
- Set the mood by playing upbeat music in the background. This will create an energetic atmosphere and put everyone in the spirit of swapping.
- Add an element of excitement and create lasting memories by setting up a photo booth area where participants can capture fun pictures with their newly found clothing items.
- Organize a fashion show where participants can display their favorite swapped outfits. This will allow everyone to witness how different pieces can be creatively styled.
- Keep everyone energized and hydrated throughout the event by providing delicious snacks and drinks. You may even consider making it a potluck and asking everyone to bring a dish to share.
Fun fact: Did you know that clothing swaps not only allow you to update your wardrobe, but also contribute to sustainable fashion by reducing textile waste?
Establish Swapping Rules
Setting clear swapping rules is essential for the success of a clothing swap event. To establish these rules effectively, follow the steps outlined below:
- Decide on the number of items that each participant can bring to the swap.
- Establish guidelines regarding the condition of clothes, requiring them to be clean and wearable.
- Create rules for the swapping order, such as drawing numbers or implementing a rotation system.
- Determine if any restrictions will be placed on certain items or sizes.
- Agree on a method for resolving disputes or conflicts that may arise during the swap.
By implementing these guidelines, participants can enjoy an organized and fair swapping experience.
Provide Refreshments
To successfully organize a clothing swap event, it is essential to provide refreshments for your attendees. This will elevate the overall experience and create a delightful ambiance. Here are some refreshment ideas that you can incorporate:
|
By offering a diverse array of refreshments, you can ensure that your guests feel warmly welcomed and thoroughly enjoy their time at the clothing swap event.
After the Clothing Swap
Now that the clothing swap is over, let’s take a look at what comes next. In this section, we’ll explore how to wrap up the event successfully. We’ll discuss the importance of donating any unswapped clothes and the impact it can have. Then, we’ll dive into the crucial task of cleaning up and organizing everything after the swap. So, let’s roll up our sleeves and ensure that the clothing swap leaves a positive and organized mark on our lives!
Donate Unswapped Clothes
After a clothing swap event, it is important to donate unswapped clothes to ensure their continued use and reduce waste. Here are some steps to take when donating unswapped clothes:
- Assess the condition: Check the clothes for any damages or stains that may render them unsuitable for donation.
- Research donation centers: Find local charities or organizations that accept clothing donations.
- Contact the center: Reach out to the chosen organization to inquire about their donation process and any specific requirements or restrictions they may have.
- Prepare the donation: Clean and fold the clothes neatly before packing them for donation.
- Dropping off or scheduling a pickup: Deliver the donation to the designated location or arrange for a pickup service if available.
After hosting a clothing swap with friends, I donated the unswapped clothes to a local women’s shelter. It felt great knowing that these clothes would be given to those in need and could make a positive impact in their lives.
Clean Up and Organize
To clean up and organize after a clothing swap, follow these simple steps:
- Donate unswapped clothes: Gather all the clothes that were not swapped and donate them to a local charity or shelter.
- Clean up and organize the space: Collect any leftover clothes, hangers, and other items. Put away any tables or racks that were used for displaying clothes.
- Sort and arrange remaining clothes: Clean up and organize the clothes that were swapped. Fold them neatly or hang them back in the closet in an organized manner.
- Thank your friends: Show appreciation to your friends for participating and making the clothing swap a success.
True story: After organizing a clothing swap with my friends, we had a great time swapping clothes and finding new pieces for our wardrobes. Once the event was over, we gathered all the unswapped clothes and donated them to a local shelter. We then cleaned up and organized the space, ensuring everything was put back in its place. It was satisfying to see an organized closet and know that the unswapped clothes were going to those in need.
Some Facts About How To Organize a Clothing Swap with Friends:
- ✅ Clothing swaps are parties where people bring their old clothes to trade for new ones. (Source: party.pro)
- ✅ Hosting a clothing swap helps friends find new clothes, recycle old ones, and support the environment. (Source: party.pro)
- ✅ Clothing swaps are a fun and inexpensive way to update your wardrobe and fight waste from fast fashion. (Source: party.pro)
- ✅ Invitations for a clothing swap can be sent through various platforms like text, email, or direct message, and should be sent at least two weeks in advance. (Source: party.pro)
- ✅ Fairness should be considered, as some attendees may not have clothes to swap but still want to participate. Some hosts use a token or ticket system to ensure equal browsing opportunities. (Source: party.pro)
Frequently Asked Questions
1. How can I organize a clothing swap with my friends?
To organize a clothing swap with your friends, follow these steps:
- Create a guest list of friends who are interested in participating.
- Gather the necessary supplies, such as clothing racks, hangers, and mirrors.
- Choose a date and location for the swap, making sure to arrange the room in a way that allows for easy browsing.
- Send out invitations at least two weeks in advance, specifying that guests should bring “new or gently used” items.
- Collect RSVPs through an online event platform to increase attendance and provide an accurate headcount.
- Establish guidelines for fairness, such as using a token or ticket system for equal browsing opportunities.
2. What should I do with the leftover clothes after the clothing swap?
After the clothing swap, it is important to plan for the disposal of any remaining clothes. One option is to donate them to a nearby center or charity that accepts clothing donations. This ensures that the clothes have a chance to be re-homed and not go to waste.
3. How can I ensure a successful clothing swap?
To ensure a successful clothing swap, consider the following tips:
- Ask attendees to freshen their clothes in the dryer before bringing them to the swap to ensure cleanliness.
- Provide full-length mirrors to allow attendees to see how the clothes fit and look on them.
- Encourage diversity in clothing styles and sizes to accommodate different body shapes and individual tastes.
- Offer a snack platter or refreshments to create a welcoming and enjoyable atmosphere.
- Show up early to set up and greet guests, helping to create a positive and organized experience.
4. How can I make the clothing swap financially inclusive?
To make the clothing swap financially inclusive, consider implementing a “swap before we shop” rule. This means that participants should bring clothes to swap before they are allowed to browse and select new items. It ensures that everyone contributes and has the opportunity to refresh their wardrobe without the need for additional spending.
5. How can clothing swaps support the environment?
Clothing swaps support the environment by promoting circular fashion and reducing fashion waste. By exchanging and reusing clothing, clothing swaps offer a sustainable alternative to the consumption cycles of the capitalist fashion system. They provide a powerful substitute to the throw-away culture and contribute to a more responsible and conscious approach to fashion.
6. What are the benefits of organizing a clothing swap with friends?
Organizing a clothing swap with friends has several benefits:
- You can refresh your wardrobe with cool new stuff without spending a lot of money.
- It allows you to find new-to-you clothes that suit your personal style and taste.
- You have the opportunity to meet new friends and strengthen your circle of friends.
- Clothing swaps support the environment by reducing fashion waste and promoting a more sustainable approach to fashion.

- How to Reduce Food Waste and Save Money - October 28, 2023
- Frugal Snack Ideas for Kids - October 27, 2023
- Top 10 Frugal Meal Ideas for Large Families - October 27, 2023